Showing posts with label SU. Show all posts

09 December 2011

Friday Sketchers #7

Another Christening card that I was asked to make by a friend (there were 3 in total so you'll see another one soon!) Do you like the little tag I made for the sentiment? It's a little trick I learnt at Stampin' Up! regionals using circle punches.
I cheated a little with this sketch, I didn't add the little strip up the side, but I was working with a fairly small card (10.5cmx10.5cm), and I couldn't make anything fit, where if I'd used a slightly bigger card I probably could have made it work, so that's a little tip for all of you playing along at home. Speaking of playing along, go check out the Challenge site and make sure you have a go!


Stamps: Button Buddies, Teeny Tiny Sentiments
Ink: Marina Mist, Basic Grey
Cardstock: Nursery Suite DSP, Crumb Cake, Wild Wasabi, Marina Mist, Whisper White
Accessories: Subtles Designer Buttons, Pear Pizzazz Poly Stitched Ribbon
Punches: 1 3/8" Circle Punch
Bigshot: Scallop Square Bigz, Tasteful Trim Bigz XL

Images © Stampin' Up!, Designs © Zarna Gould

25 November 2011

Friday Sketch Challenge #6 (and catching up with #5)

Hi everyone! Time for another Friday Sketch Challenge, This was a really fun & easy sketch to work with so make sure you pop by the Challenge website and play along! This is a little monochrome(ish?) card I was asked by a friend to make for a christening she was attending. I thought the sketch needed the cute teddy bear from "My Favourite Bear", which is one of the very first sets I purchased and haven't been able to part with even though it has been retired for years.


Stamps: Calendar Alphabet, My Favourite Bear
Ink: Early Espresso
Cardstock: Subtles Patterns Stack (Certainly Celery), Crumb Cake, Certainly Celery
Accessories: Antique Trinkets
Punches: Modern Label
Bigshot: Stripes Textured Impressions, Petal Cone Bigz L


I played along with the last challenge for my DT commitments, but I didn't get the chance to post here, as I was attending a family wedding. So I thought I'd post the card here as well.
This is the card I made for Chris (Justin's Brother) & Amy's wedding. I also made their wedding invitations so luckily I had insider knowledge of the colour scheme, stamps used etc and was able to make a card that coordinated with the wedding perfectly ;)


Stamps: Elements of Style, Monogram Sweet Alphabet
Ink: Cherry Cobbler, Versamark
Cardstock: Basic Black, Cherry Cobbler, Whisper White
Accessories: Black & Clear EDP, Basic Black Satin Ribbon
Bigshot: Vintage Wallpaper Textured Impressions

Images © Stampin' Up!, Designs © Zarna Gould

06 October 2011

Beautiful Butterflies in 3D

The other month I held a 3D class as my regular Stampin' Up! class. We also made a Snow Globe card but I'll show you guys that one closer to Christmas.
The other 2 projects we made were a pop up card and a matching gift box using the Fancy Favour Bigz XL die.

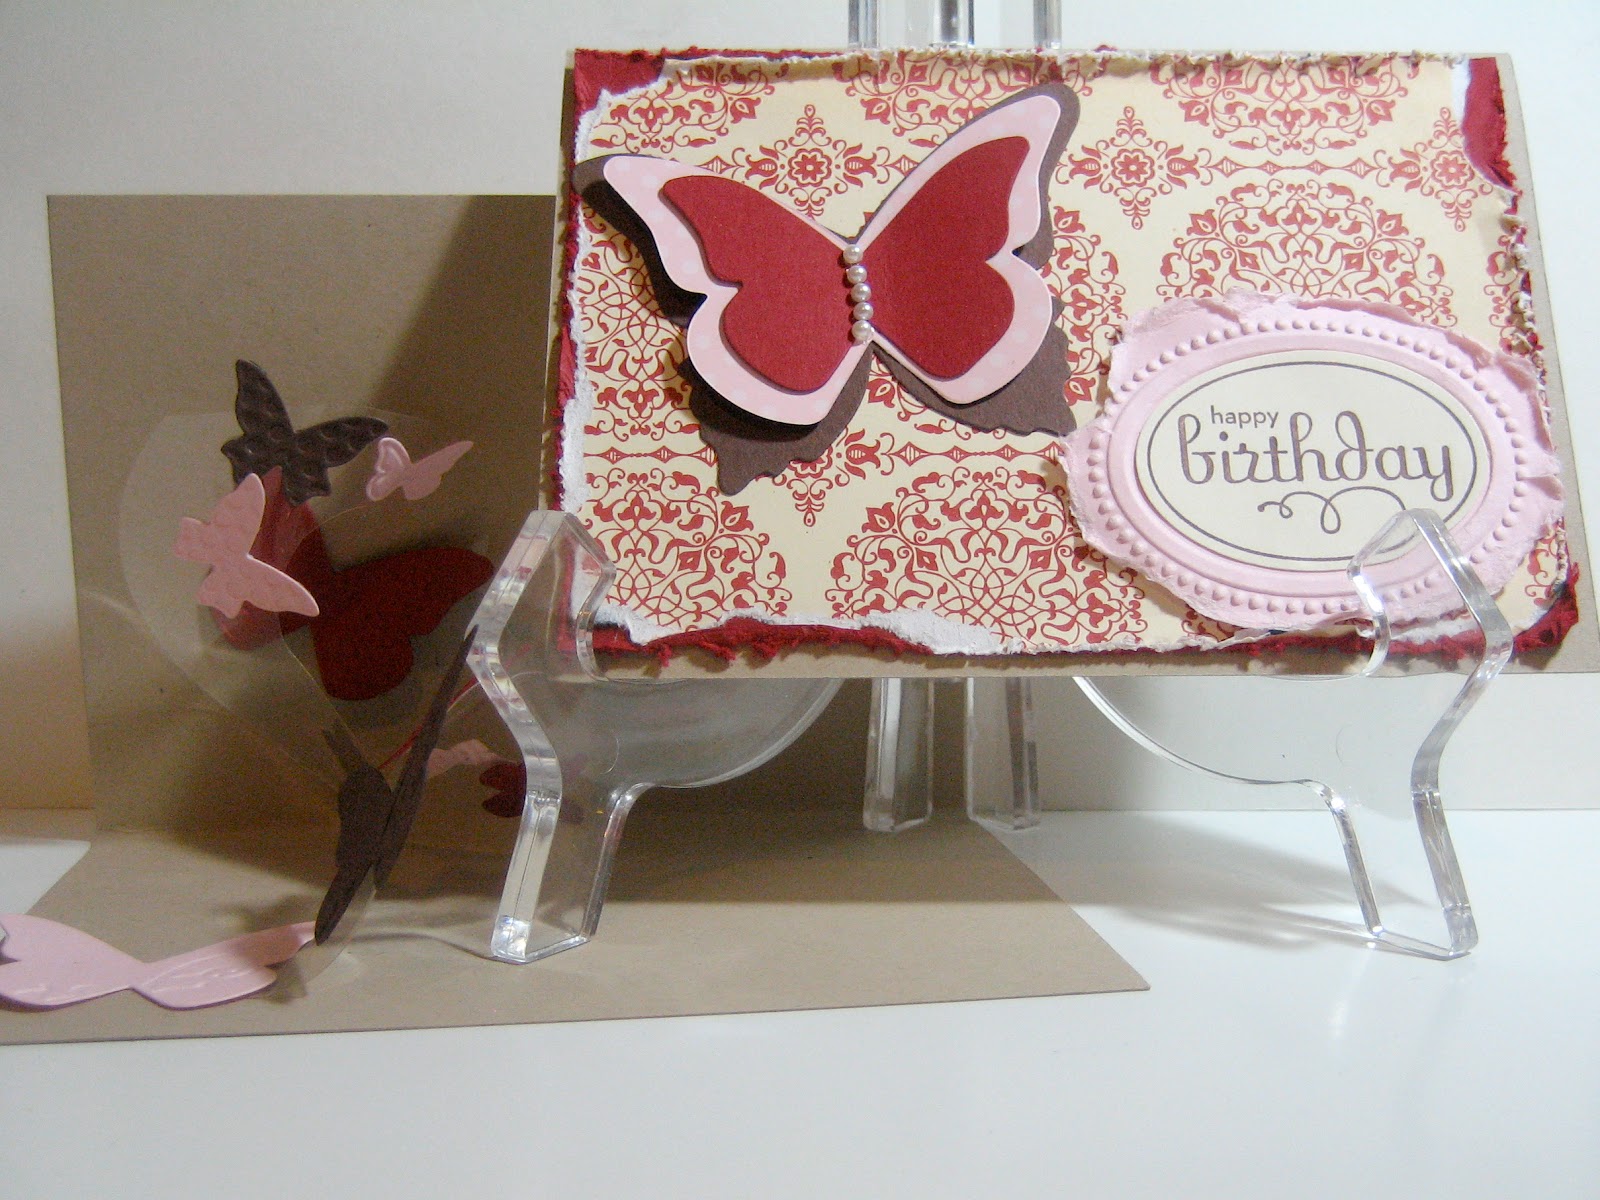
 Here is the card we made, inside and out, we used some window sheets to cut a spiral so that the embosslit butterflies seem to fly off the page.
And the matching box, isn't this so cute?? Perfect size for popping some home made yummies or a bit of jewellery inside.


Stamps: Perfect Punches
Ink: Chocolate Chip
Cardstock: Love Letter DSP (retired), Crumbcake, Cherry Cobbler, Pink Pirouette, Very Vanilla, Chocolate Chip
Accessories: Window Sheets, Basic Jewels Pearls

Punches: Wide Oval, Butterfly
Bigshot: Fancy Favour Bigz XL, Beautiful Butterflies Bigz, Beautiful Wings Embosslits, Designer Frames Textured Impressions
Tools: Circle Scissor Plus


Images © Stampin' Up!, Designs © Zarna Gould

30 September 2011

Friday Sketch Challenge #2

 I'm a little late for today's challenge, sorry about that girls! I have the kids' party planned for tomorrow and our location has a 90% chance of being rained out, so I've had to ring around and tell everyone who is coming that I've changed the venue, (oh and did I mention I'm pretty sure I've missed some people we should have invited! So if you're reading this and thinking you missed out - sorry! but I'm sure you aren't the only ones lol)
Anyway, onto today's card: I followed the gorgeous sketch over on Friday Sketch Challenge. I was inspired by a card i saw on Tracey's facebook page to use a Textured Impressions folder as a focal panel and I thought this sketch was the perfect card to try it out on. The rest is pretty straight forward, silver embossing for the other focal panel, some rhinestone brads, buttons and ribbon make up the card.

Before I go I thought I'd show you my new personalised stamp that I use for my cards now. I got a friend of mine (Mike Perry of No Dice Comics) to design up a stamp that matches my Zarna Gould Designs website & facebook page theme and then got it manufactured locally. I think Mike did a fantastic job for a very reasonable price, so if you need anything like this done up let me know and i'm happy to give you his details!
PS Never fear SU! gals, I always include appropriate SU! copyright info when packaging my cards & invitations that I sell, I just wanted to leave my options open for the odd times that I need to use another company's stamps so I can credit them the appropriate way as well, and as a result thought it was best not to include this info on the stamp design ;)


Stamps: Baroque Motifs
Ink: Versamark, Certainly Celery (for sponging)
Cardstock: Subtles Patterns DSP Stack (Certainly Celery), Certainly Celery, Whisper White
Accessories: Clear Rhinestones, Neutrals Buttons, Whisper White organza, Silver EDP
Big Shot: Manhattan flower Textured Impressions Folder 
Images © Stampin' Up!, Designs © Zarna Gould

16 September 2011

Friday Sketch Challenge #1


I'm so excited to be sharing with you for Friday Sketch Challenge #1! I'm loving being back on a design team again, I've missed it so much since JSM & The Blend ended.
Our first sketch was designed by Debra and I think she did a fantastic job!
Aliens wearing cowboy hats!
Click to make larger

I took inspiration for my girly monster card from the background DSP, the first time I looked at it I saw little aliens in the pattern so I knew making a monster card was in order and of course the pink meant it had to be a girly monster card!

I have used Melon Mambo and (new in colour!) Lucky Limeade for my monsters. The Limeade one was coloured by mixing a little reinker and shimmer paint together then using my aqua painter to brush it on. She's so sparkly in real life! The Melon monster was made spotty by using scraps of paper to mask the edges and stamping the eye stamp on her body then washing over it with the aquapainter to wash out some of the spots and pull colour to other areas, I used a bit of Melon Mambo ink to fill in the gaps left over and to create a little shadowing on her underside.


Stamps: Just Believe, Make a Monster
Ink: Melon Mambo, Lucky Limeade, Stazon 
Cardstock: Cheerful Treat DSP, Lucky Limeade, Melon Mambo, Concord Crush, Pretty in Pink, Watercolour Paper, Whisper White
Punches: Boho Blossom, Word Window
Bigshot: Scallop Circle
Tools: Circle Scissor Plus, Aquapainter
Accessories: Pink Pirouette Taffeta, Subtles Glimmer Brads

12 August 2011

Stampin' Up!'s new (to us!) Designer Fabric

 I've been having heaps of fun playing around with my preorder from the new Stampin' Up! catalogue that will be out in September. Especially the new Designer fabric! I made a little memory board to display my card samples when I am out and about, I used a 12x12" frame that I already had (It used to house this piece of wall art). I used a piece of DSP backing cardboard for my base, layered some quilt batting that I had left over from Asher's Quilt. Glued it all down at the back using Tombow and then criss-crossed the Satin Ribbon across the front, stuck them down at the back with sticky strip. I poked some vintage brads through all the layers - this was the trickiest part, even though I used the Paper Piercer the fabric & ribbon sort of sprung back into place and the brad prongs wanted to bend a little, but I got them through with a bit of wiggling. I backed it all with another piece of DSP backing card glued down with more tombow. Popped it in the frame & I was done.
It took about half an hour to complete including the time spent wrangling the children out from under my elbows, so easy!

Another project I made, again simple but not as quick, this time a little shirt for Charlotte (inspired by this pin on pinterest), she is a slim size 4 and the long edge of the Designer fabric wraps all the way around her with an inch or 2 to spare, I think this would make a beautiful newborn baby dress! I completed this in 1 and a bit days, if I'd had a more cooperative "mannequin" I would have finished sooner lol


Fabric: Flirtatious Designer Fabric
Accessories: Rich Razzleberry Satin Ribbon, Vintage Designer Brads

Images © Stampin' Up!, Designs © Zarna Gould

23 May 2011

Guest info packets

With the hostess special (details below) this month I thought I'd spend a bit of time updating some of the "tools" I use for workshops. One of the things I like to do is make up a few info packets filled with any current promo flyers, mini catalogues, wish lists, business cards & order forms etc, basically anything a guest needs at a workshop that isn't part of the make & take.
The folders I use are just plain white folders:

Pretty bland huh? So I decided to Stampin' up!-ify them. I used some of the retired Island Oasis DSP that I had left over from the Summer mini catalogue, added some scallops made with the Tasteful Trim Bigz XL & "Stampin' Up!" using Timeless Type Jnr Alphabet Sizzlits out of coordinating cardstock.
I kept them fairly flat and simple so they don't get ruined in transit, I'm planning on putting some contact over the top, but if my school books were anything to go by I thought I better take a picture first ;p
I had a little "helper" when I was making these, my nephew Asher came over for a little while today so Carmen could get some quick jobs done that would have been made more complicated by getting a baby in and out of the car at every stop. He slept peacefully the whole time but agreed to model one of the folders for me:
Isn't he beautiful?
Anyhoo, I mentioned the hostess special earlier, here are the details. Book a workshop with me between now & the end of June and Stampin' Up! will give you an extra $70 of free hostess credit if you get $450 worth of orders at your workshop. Contact me today to book your workshop, imagine how much you would be able to cross off your wishlist with $110+ of FREE credit! I would love to give you all those extra goodies for free!


Cardstock: Island Oasis DSP (Retired), So Saffron, Tempting Turquoise, Pumpkin Pie, Rose Red, Old Olive
Bigshot: Tasteful Trim Bigz XL, Timeless Type Jnr Sizzlits


Images © Stampin' Up!, Designs © Zarna Gould

30 April 2011

A Card for Asher (Warning: lots of proud Aunty moments coming up!!!)

My nephew Asher James Xavier Gould was born on 23 April 2011 at 10:20pm weighing in at 3.3kg or 8lb 5oz for those of us that only know baby weights as imperial measurements. He is beautiful and healthy and I'm in love!
So, what's the first thing a stamper needs to do when she finds out she's an Aunty? Make a card of course!! (well ok, it wasn't exactly the first thing, the first thing I did was wait until we got home from Orange - he had to be born the weekend we were away!! Then I had to meet him in person, BUT the next thing I had to do was make him a card lol)

This card was super easy to make using the new Tasteful Trim XL Bigz die in the Winter mini, I cut 3 layers at a time and only had to run the die through the bigshot twice! Then it was just a matter of gluing the strips down. I used all the Blues & Greens from the Soft Subtles Patterns Stack as well as sneaking in a little Yellow (Bashful Blue, Baja Breeze, Marina Mist, Certainly Celery, Wild Wasabi & So Saffron). The yellow is a bit of a dig at the new dad who doesn't think that yellow can be a colour for baby boys, Carmen & I love taking every chance to point out that yellow can be a perfectly boyish colour!
I CASEd this card from this online find, toning it down to suit the new baby look (but it's still on my list to recreate exactly as shown, it's such a beautiful card!):
Now for the proud aunty pics! (I had to steal these from facebook because I was too busy having cuddles that I forgot about taking any photos of my own! But I know that I will rectify this next time I visit!
Sucking his little thumb, isn't he the most adorable thing you've ever seen???
He has eyes!
Safely home!

Images © Stampin' Up!, Designs © Zarna Gould

27 April 2011

Baby Shower for Carmen

My sister-in-law had her little boy Asher (proud Aunty post to come next time, I've got to give the card & gift to her before I can post it here)
One of the girls from work threw a baby shower for my sister-in-law Carmen but our mother-in-law and Nana-in-law couldn't make it so I threw another one for everyone who couldn't come to the first one, of course I couldn't help adding a bit of SU! style to the decorations!
A banner made with SU! products, I didn't use the pendant die because I didn't have it but after handmaking each of these little flags I'm really wishing I did have it!
I had to keep a gender neutral theme for the decorations which was hard because even though I knew that he was a boy there were people who didn't want to know what she was having. I think I went a bit overboard with pink trying to compensate for knowing he was a boy lol!
Close up of the banner, I used the Bigz alphabet dies (name escapes me right now) covered in a little crystal effects for some shine.
This little journal idea I stole from a friend who saw it at a baby shower she went to. It's a little journal of mummy tips & childhood stories for the mother to be, I covered a 5x5" On Board art journal with some Lap of Luxury DSP.
Close up of the ribbon covered spine, I had fun with this one, can you tell? ;p
I added a little tab for each category & her name using the Timeless Type Jnr Sizzlits dies.

Images © Stampin' Up!, Designs © Zarna Gould

13 March 2011

Pinterest Eyecandy

A little something from my pinterest boards today


Just to be clear I'm not claiming this work as my own, just projects that inspire me in some way and I want to stamp like this when I grow up.

Images © Stampin' Up!, Designs © Zarna Gould

12 March 2011

Some eyecandy for you

I've discovered pinterest lately and I've been using it to keep track of stamping projects that inspire me. I thought if I post some of my favourite "pins" you might forget that I haven't posted any of my own work on here all week...


Just to be clear I'm not claiming this work as my own, just work that I think is fantastic and love and I want to stamp like these ladies when I grow up!

Images © Stampin' Up!, Designs © Zarna Gould

07 March 2011

New video series - Quilting with the Bigshot

I have a new video series for you, here are the first 2 videos, I'll get the rest up once I edit them and as I finish the quilt.
Excuse the eyeshadow, it wasn't really that dodgy looking but I had trouble with lighting and it made it look darker. I hope you enjoy them, it's my first go at using iMovie as well as at filming myself so I have a bit to learn. I also don't know how to choose the exact point I want for the YouTube thumbnail so I can't get rid the dodgy ones of me for the pretty intro sequence I made...


Introduction:


Link for quilt sizing: http://www.stargazey.com/downloads/sizingbedquilts.pdf


Tools & Prep:


Images © Stampin' Up!, Designs © Zarna Gould

04 March 2011

Baby Shower Card

I woke up sunday morning, the day of the baby shower and realised that I had a gift for the mother to be (see my quilt post from Wednesday) but that I hadn't made a card yet! So excuse the photo, & messy desk, I didn't have time to do my usual set up (I didn't even have time to get out my Daylight lamp that I use to make the colours look nice, thank goodness for iPhoto!)
I already had the Marina Mist Ribbon sitting out on my desk from when I'd made the quilt so straight away I decided that would have to go on the card, and after having a quick flick through my inspiration list bookmarks I found this cute card from Amanda Reddicliff and decided I loved how the DSP & Bigshot lettering were the main focal point of the card. I moved the lettering around (not because I put the DSP & ribbon too high on the card or anything like that lol) and added a cute little vintage tag held with the cute little Vintage Trinket safety pin ( both in the Summer mini, less than a month left to order!)


Stamps: Medallion, Short & Sweet
Ink: Marina Mist
Cardstock: Subtles Patterns DSP Stack (Bashful Blue), Marina Mist

Bigshot: Timeless Type Jnr Sizzlits
Accessories: Marina Mist 1 1/4" Grosgrain, Vintage Trinkets, Vintage Tags


Images © Stampin' Up!, Designs © Zarna Gould

02 March 2011

Bigshot quilt

I had my first go at quilting just recently and I finally finished the quilt so I thought I would post it here. It's not the most traditional of Stampin' Up! projects but I have used a couple of SU! products to show you some of the versatility in your stamping stuff that you already have lying around at home.

This is a little cot sized quilt that I made using the Scallop Square Bigz Die & my bigshot to cut all the squares.
If you're a quilter you've probably already spotted the main difference between my quilt and a normal rag quilt, however I'm not a quilter and I just started happily stitching along before I thought to check out any tutorials etc, so I didn't know that when you quilt a rag quilt you should quilt the backing, batting & front piece together all before you start assembly rather than assembling the front first then quilting the backing & batting together to the front at the end.
It wasn't until I took it to my friend (who is a quilter) and said "What do I do now?" that she told me all the things wrong I'd done (she was rather too helpful with that part lol!). But with a little creativity (mostly on her part) we were able to work around my mistake and find a way to make it work. Had I done it properly it would have just been a case of stitching around the border to keep the edge pieces together & the quilt would have been finished by that stage, but oh well, we live & learn right?
I attached a border around the edges, then cut the batting & back to size. I pinned it all together & stitched these little borders around the outside (I'm sure there is some technical quilting term but I'm happy with borders). Since there wasn't traditional quilting over the middle of the quilt to hold the pieces together I did have to add a few little hand stitches in amongst the ruffled edges to hold the 3 pieces together and make sure that it could be gentle machine washed.
To finish it off nicely I folded some Marina Mist Striped Grosgrain in half to make a sweet little border around the edge of the quilt. The extra wide grosgrain is soft enough that it was easy to handle and the edge of the quilt is still nice and flexible. I originally added this to hide yet another mistake I had made but I'm really glad it worked, I think the Marina Mist looks really good next to that baby blue flannelette.
I wish you could feel this quilt, it is all sof flannelette & so so soft! I didn't want to give it away at the baby shower, I wanted to cuddle up to it in my own bed instead!
I enjoyed making this quilt so much that I'm going to have another go at a rag quilt & this time I am going to make it properly, I will be in Bathurst today so I'm so excited to go to spotlight and pick out some fabric for Charlotte's quilt!!! It will be the first time in years that I will be making a beeline for the material section rather than the scrapbooking/crafts area!
Too bad SU! don't have their beautiful range of fabric available in Australia, I could be ordering right now from the comfort of my couch :) Speaking of ordering, if anyone needs anything I will be placing an order for myself  next week so if there's anything you want while you can still earn Sale-a-Bration freebies drop me a line and I might be able to save you a little on postage by combining your order with mine


Bigshot: Scallop Square Clear Bigz Die
Accessories: Marina Mist 1 1/4" Grosgrain


Images © Stampin' Up!, Designs © Zarna Gould